Installation and Configuration
MQ Monitor Installation
MQ Monitor Plugin is installed using the Web ViewPoint Enterprise’s My Nonstop browser-based wizard. Since it is installed within the Web ViewPoint Enterprise’s environment, you’d need the WVP E Install Guardian Sub Volume and OSS folder location.
Before proceeding with installation of MQ Monitor plugin, please stop all other plugins, if applicable (e.g., Shadowbase Monitor, Connex Monitor, Base24 Monitor, or Spooler Monitor). Web ViewPoint Enterprise doesn’t need to be stopped.
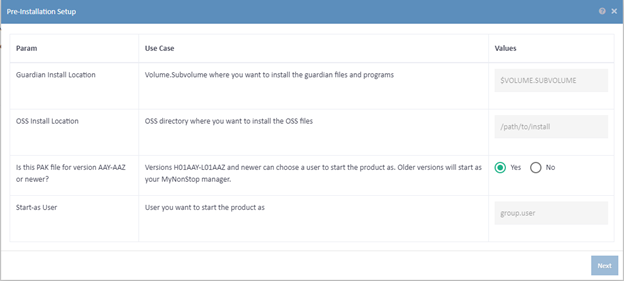
To begin the installation, simply click on Install button to fetch the installation files from RA Studio and to upload to your Nonstop server. Next, a Pre-Installation screen is prompted for you to enter the details of Web ViewPoint Enterprise’s Install location.
Please note that for MQ Monitor, you will need to start it up as the same user who started IBM MQ application in your environment. Following prerequisites need to be done before proceeding to the next steps:
1. Logon with your user on TACL and go to your My Nonstop subvolume.
2. Run following commands:
> FUP DUP AUTOOPER, AOnnnnnn
> FUP GIVE AOnnnnnn, <MQ User>
3. Logon as <MQ User> on TACL and go to your My Nonstop subvolume.
4. Run following command:
> FUP SECURE AOnnnnnn, NONO, PROGID
Best practice for creating the appropriate copies of AUTOOPER is AO + 6 numbers, e.g., AO123456
Click on ‘Next’ button: transfers (if required) and unpacks PAK file to the specified install locations.
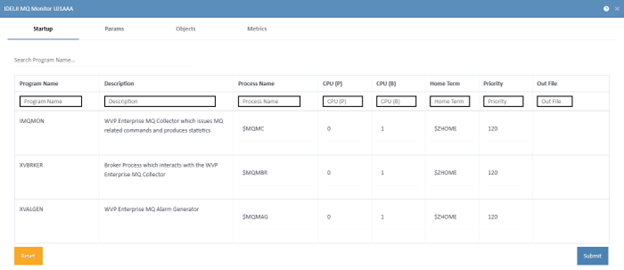
On the following screen, configure the startup parameters for 3 Startup programs used by the MQ Monitor Plugin:
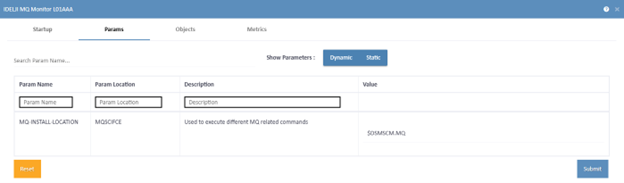
Then, set up the Configure Params:
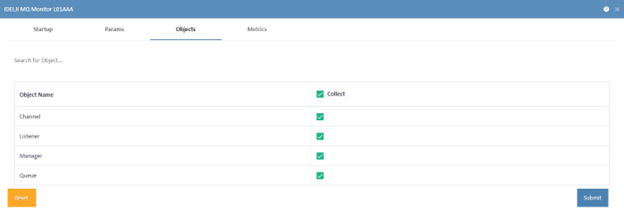
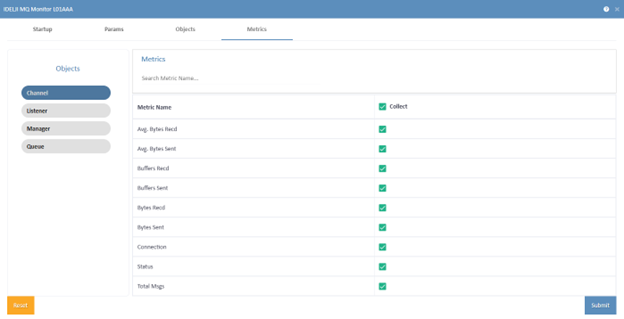
Then, specify the Entities/Objects to collect. Note that only the collected Entities/Objects will be available for display and alerting on WVP Enterprise.
Then, for each of the Entities/Objects, you can select which metrics to collect.
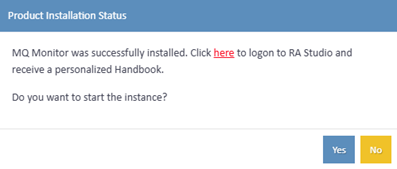
Click on the Install button on the Installation and Configuration screen. The wizard updates the parameters and completes the installation of the plugin. Upon successful completion, it first asks you if you want to logon to RA Studio to receive a personalized Handbook consisting of all the configuration settings and details in it.
Upon successful registration and login to RA Studio, it downloads the Handbook. You can see all the changes that you made to all the configuration settings and parameters here besides the default values assigned initially.
After this, it asks you permission for starting the instance. If the user chooses to start the instance, the wizard obeys the MQ Monitor startup file and verifies that the expected processes have started up.
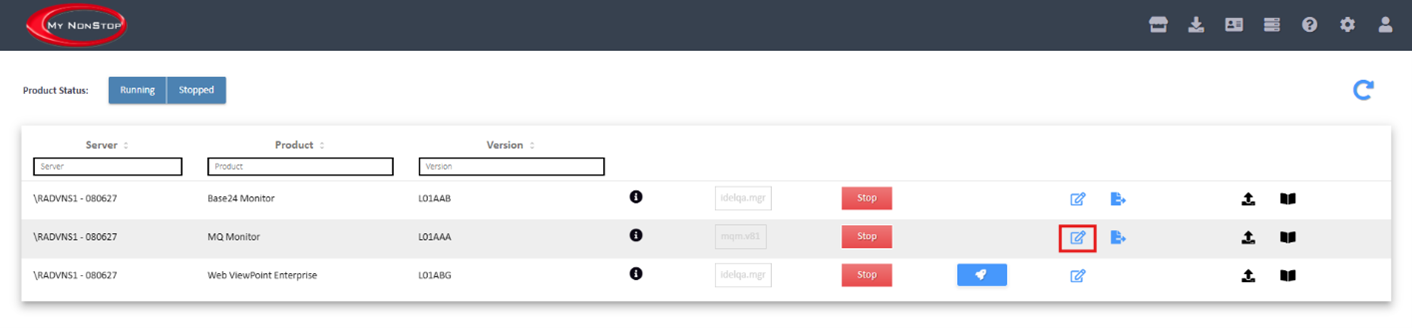
To make any changes in the future regarding the configuration parameters and settings, you can visit the Manage Section on your My Nonstop and make the required changes to your installed products.
Post-Installation Setup
MQ Monitor needs to be started with the same user as IBM MQ application in your environment (E.g., mqm.manager).