Installing Web ViewPoint Enterprise
Web ViewPoint Enterprise (WVP E) is an automated operation and management software Product for Hewlett Packard Enterprise (HPE) NonStop Servers. It is browser-based and supports most popular commercial browsers, such as Microsoft Edge, Chrome, and Firefox. You may:
- Monitor your system performance and availability, and be alerted when thresholds are exceeded.
- Monitor and review EMS (Event Message Subsystem) messages
- Access operational subsystems such as Storage, Spooler, Pathway
- Set alert conditions, and be notified
- Review
WVP E users can actively monitor their NonStop Servers and have access to a variety of operational features and analytics. They can also set operational conditions and thresholds they want WVP E to actively monitor. WVP E can also be set to alert others when certain events occur, attempt automated recovery from failures, and escalate to upper management when necessary. WVP E can share its information with a variety of open Enterprise platforms (e.g., ServiceNow, Moog, Splunk) using standard protocols (e.g., SNMP, JSON). Users may also forward and display metrics from WVP E onto open platforms such as Kibana and Tableau. In an expanded role, WVP E can receive and display metrics from user Applications on NonStop.
Steps for Installing Web ViewPoint Enterprise
Once you have installed My NonStop successfully, you can begin installing Web ViewPoint Enterprise and other plugins such as Shadowbase using the browser-based wizard. Note that, the installation for Web ViewPoint Enterprise will be performed under the same group.user who installed My NonStop in Step 1.
There are three different ways to install Web ViewPoint Enterprise: Using Studio, NonStop, or My PC. The first way is by using Studio. Note that this method requires a strong internet connection. Once you log on to My NonStop, navigate to the Shop & Install tab on the left and then select “Studio”. This will list all the available products and definitions that are published on NonStop Studio. You will see the latest WVP E SPR listed here. Clicking on Install button begins the Pre-Installation setup.

Before we dive into the Pre-Installation setup, let’s quickly go over the other two installation methods. The second way to install Web ViewPoint Enterprise is by using NonStop. Here, you simply select the PPAK file of Web ViewPoint Enterprise that is already present on your NonStop server. All that you need to do is choose the location of the install PAK file on your NonStop server from the dropdown list.

The third way is by using My PC. This allows to upload a Product Version’s Install PAK file from the PC. Clicking on Install button on either of the three tabs begins the Pre-Installation setup.

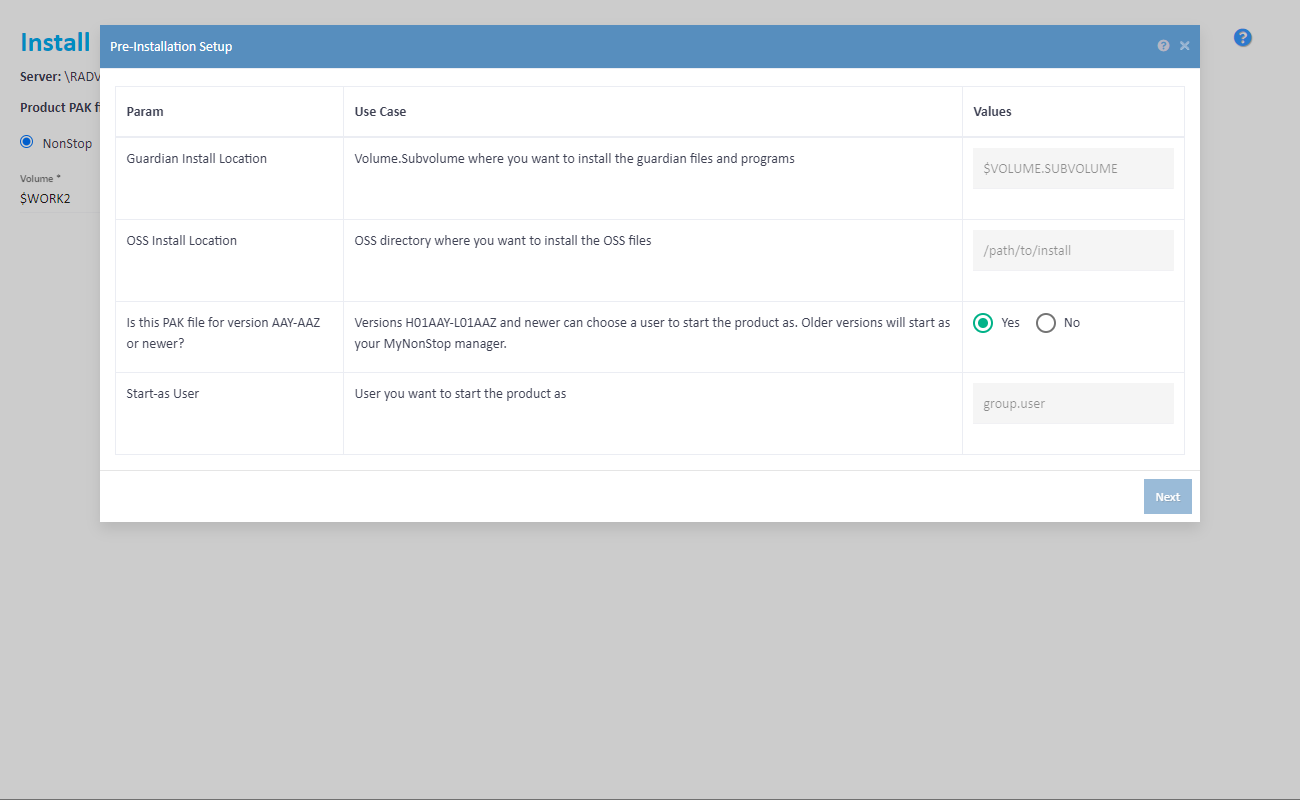
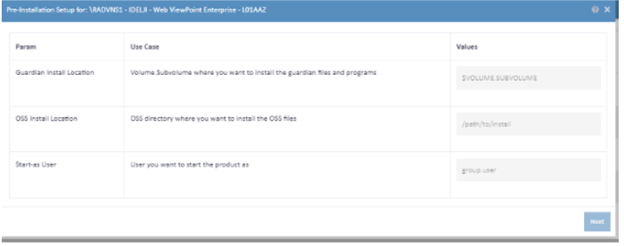
The Pre-Installation Setup involves fetching the Install files (Known as PPAK i.e., Product PAK files) from RA Studio followed by prompting you to enter the Guardian & OSS locations where you want to install WVP E on your server.
For version H01AAY-L01AAZ and newer PAK files, you will be asked which NonStop user you want to start the product as. “Start-as User” can be the same as My NonStop Manager or a different user.
Note: In order to start the product the user needs to have ‘read’ permissions for the config file: idelji.web viewpoint enterprise.l01abd.pyaml.yaml (for L-series) or idelji.web viewpoint enterprise.h01abc.pyaml.yaml (for J-series) and Smart Metrics yaml file smart-metrics-profile.yaml.
Both files are in wvpe OSS location: /usr/tandem/<wvpe_oss_folder>/data/definitions.
For version H01AAY-L01AAZ and newer PAK files, you will be asked which NonStop user you want to start the product as. “Start-as User” can be the same as My NonStop manager or a different user.
If you are installing WVP E version H01ABC-L01ABD or latest and would like to start the product as a different user than your My NonStop manager, following prerequisites needed to be done before using this feature.
-
- Logon with your user on TACL and go to your My NonStop subvolume.
- Run following commands:
fup dup AUTOOPER, AOnnnnnn
fup give AOnnnnnn, <user>
- Logon as <user> on TACL and go to your My NonStop subvolume.
- Run following command:
fup secure AOnnnnnn, NONO, PROGID
Best practice for creating the appropriate copies of AUTOOPER is AO + 6 numbers, e.g., AO123456.
Upgrading Web ViewPoint Enterprise in the existing Guardian and OSS Install Locations
When installing or upgrading Web ViewPoint Enterprise, the user will be asked to specify the Guardian and OSS locations. If the user intends to upgrade Enterprise in its current location, they can enter the location details, and My NonStop will prompt them with the following.
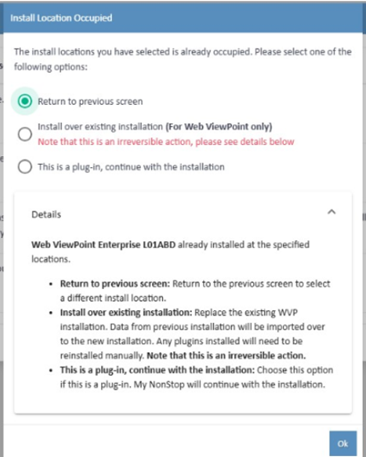
Once done, the installer goes ahead and unpaks the installation files for WVP E and then asks whether you want to install a fresh instance of Web ViewPoint Enterprise or want to Import Over from an older version to the latest one. If you choose the latter, the setup wizard asks for the location of the Web ViewPoint Enterprise that you would like to import all the data from.

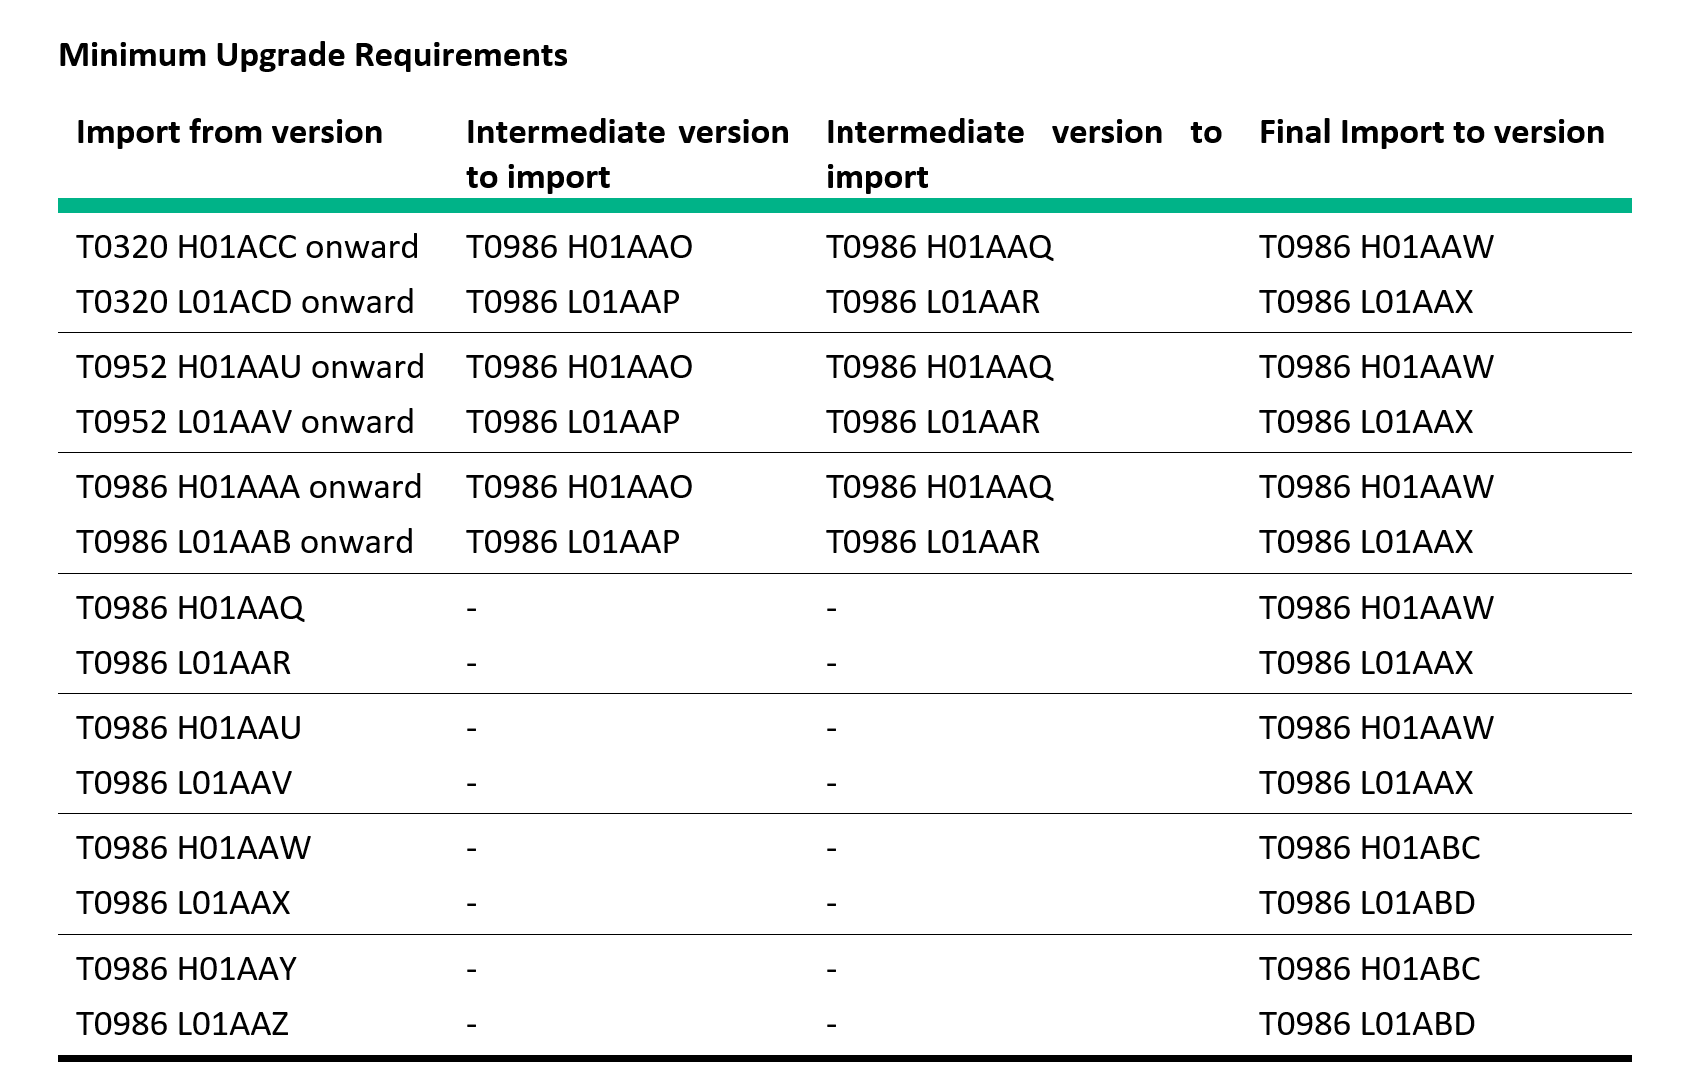
Note that Import Over can only be performed if you’re currently using T0986 Web ViewPoint Enterprise H01AAY or T0986 Web ViewPoint Enterprise L01AAZ. Once this is done, it asks for the parameters and settings to be configured for Web ViewPoint Enterprise.
You can make your desired changes to Startup Parameters and Configure Params now. Make sure to assign unique Startup processes, LISTENER-PORT and TCP-PROCESS values that the Web ViewPoint Enterprise will be using.

Once you press Submit, the wizard proceeds with installing the product and upon successful completion, asks you permission for starting the instance.

You can then access Web ViewPoint Enterprise using the unique URL generated using the LISTENER-PORT value that you previously assigned. To make any changes in the future regarding the configuration parameters and settings, you can visit the Manage Section on your My NonStop and make the required changes on the installed products.
Setting the System Name on the Logon screen
- To update the \NODENAME to the actual system name (e.g., \CTD7S), you’ll have to edit the host.json file present in the ‘data’ directory within the OSS location of your Web ViewPoint Enterprise instance.
- Via an FTP file transfer program (e.g. Filezilla), connect to the Nonstop server OSS location of your WVP E instance (e.g., /usr/tandem/wvpe/assets/data) and edit the host.json file.
- Replace NODENAME with the actual system name in double quotes (e.g., “CTD7S”). Note: Do not add ‘\’ before the NODENAME.
- Save the changes in the host.json file.
- Stop and restart the WVP E instance (you can do that from My NonStop -> Manage page) and launch the URL in the browser.
- Once this is done, you should be able to see the actual system name.