-
Getting Started
-
Dashboard
-
Events
-
Operation
-
Analyses
-
Admin
-
- Are there any prerequisites before I create and forward Alerts?
- How can I forward Alerts to Enterprise Manager Tools?
- What are my options for adding and customizing Alerts?
- How can I check the status of my Alerts?
- How can I Activate and Deactivate Alerts?
- Do I have an option of viewing Alerts that were generated i.e. Alert Logs?
- How can I take an automated action when the Alert conditions are breached?
- Can I copy Alerts from one NonStop server to another?
- How can I suppress alerts for duplicate EMS messages?
- How can I escalate Alerts?
- How can I check Alert Detail for a specific metric?
- How can I configure/update SMTP information?
-
- Overview - Create and Manage Users and Response Teams
- Are there multiple authentication methods?
- Can I restrict user permissions to specific sections of the product?
- Can staff members create their own Alerts?
- Can Manager add Alerts and make them public to other Staff users?
- Add a Group instead of individual aliases
- User Access Log
-
Onboard Your Own Apps
-
Considerations and Configurations
-
Troubleshooting Tips
-
Plugins
- Articles coming soon
-
Smart Metrics
-
Appendix
< All Topics
Print
Neighborhood Configuration
0 out of 5 stars
| 5 Stars | 0% | |
| 4 Stars | 0% | |
| 3 Stars | 0% | |
| 2 Stars | 0% | |
| 1 Stars | 0% |
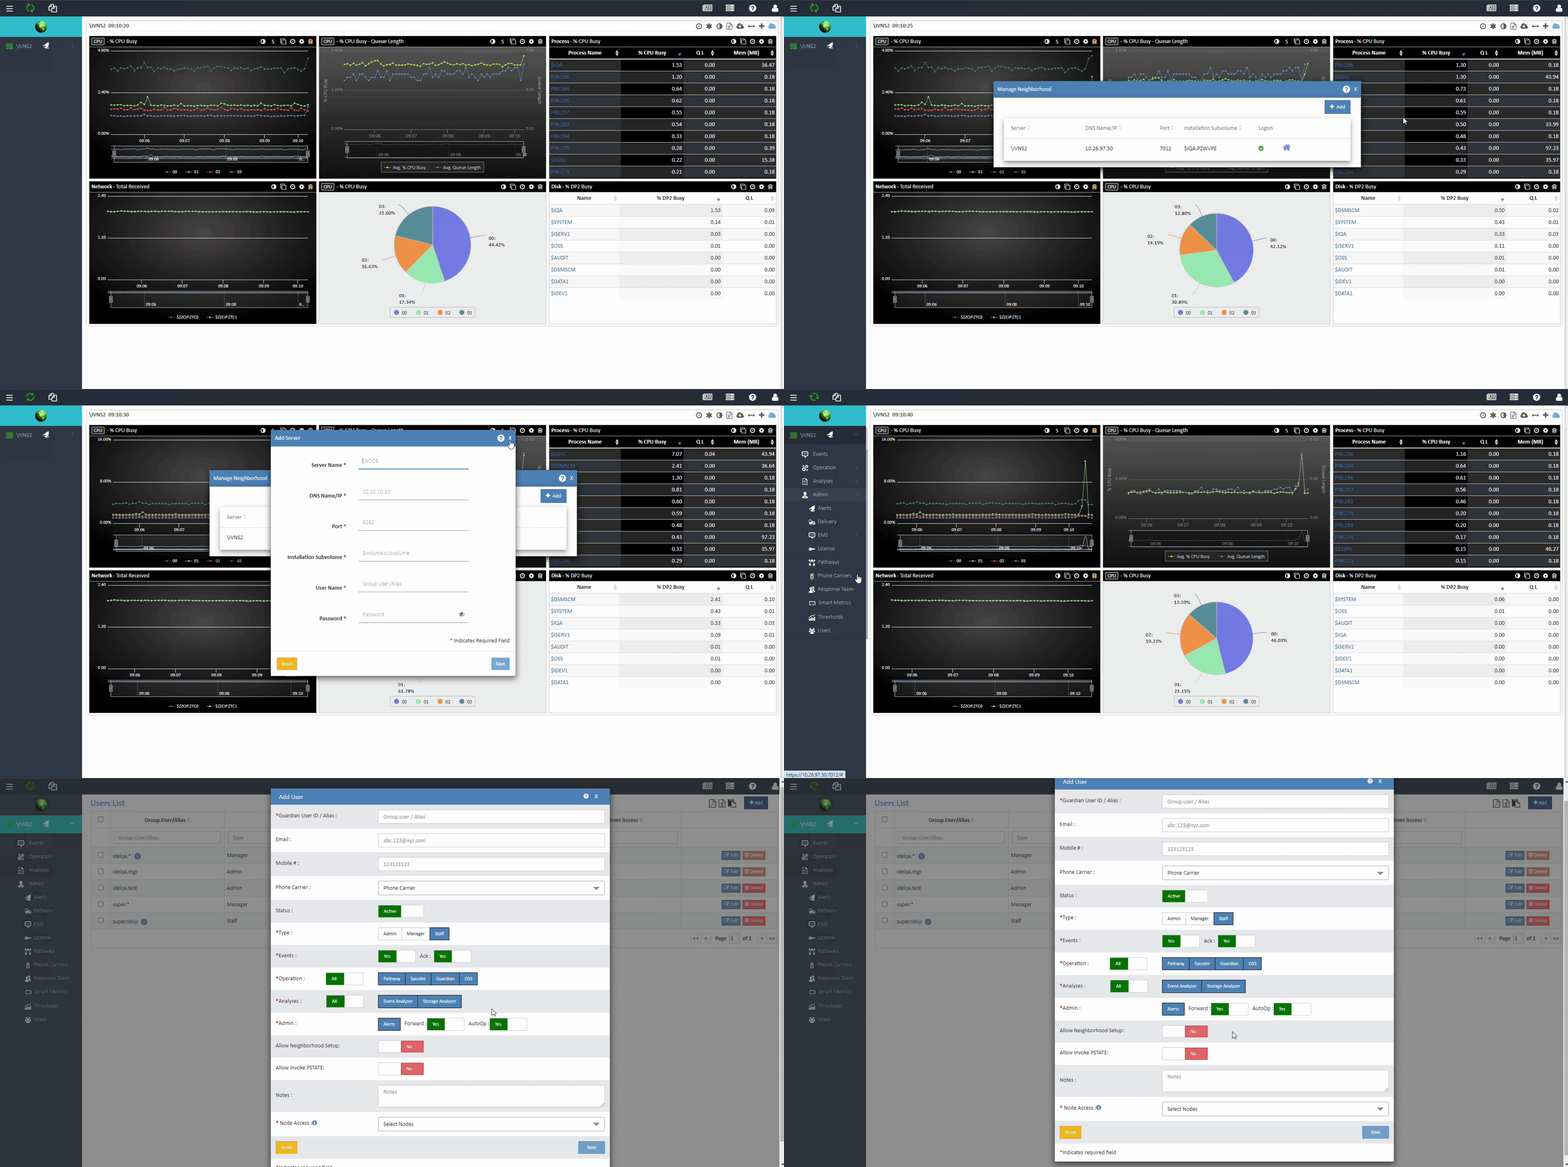
The Neighborhood settings have been moved to the main toolbar on the Global Dash screen, visible only after logging in to WVP E.
To add a Server to a Neighborhood, click on Manage Neighborhood icon on the top right corner. This action triggers the appearance of a “Manage Neighborhood” modal window, enabling users to add and manage one or more systems within the neighborhood.
- Authentication Requirement: To ensure security, the ability to modify Neighborhood settings is now restricted to authenticated users. This means users must log in through the Web ViewPoint Enterprise UI during installation and configuration to make any changes.
- Admin Controls: Administrators can now manage who can configure Neighborhoods via the Admin → Users screen. This new control allows for precise management of user permissions, ensuring only authorized personnel can view/make changes to Neighborhoods on WVP E.
Click on Add button to add a new Server to a Neighborhood.

To remove server from a neighborhood, click on delete button next to the server’s name.
Was this article helpful?
0 out of 5 stars
| 5 Stars | 0% | |
| 4 Stars | 0% | |
| 3 Stars | 0% | |
| 2 Stars | 0% | |
| 1 Stars | 0% |
5
Table of Contents

